October 8th - 13th 2013
More painting and waiting for paint to dry. Which it doesn’t do while you watch it so I took the time to plan ahead a little.
This room is going to have a central cooking pit. So I wanted to give the room a warm feeling - sort of like a kitchen where people congregate while they eat but also cook what they are eating in real time. I’ve never liked the idea of dining rooms or separate rooms for eating. What I grew up with was a kitchen and eating area - you want seconds, they’re on the pot on the stove go get some. An American kitchen is also a place where people sit and chat. So I just loved the idea of this room in the ryokan being food prep and chat all in one (as well as technically being a place where you will sleep too! How cool is that?)
So, I wanted at least one wall a sort of warm orange ochre color. I had to mix the color (some Orange, Santa Red and Burnt Umber) and had to be sure I had enough. I had looked ahead (as usual - it’s a good idea just in case you forget to mix enough color that you’re going to need later) and in fact found that the door panels are supposed to be the same color ochre. So, I found the next chapter and pulled the pieces that needed painting from there. I had to sand them a bit before the second coat as the wood is not the smoothest quality but they look acceptable. I then sealed them back up into the chapter pack till I finish this chapter.
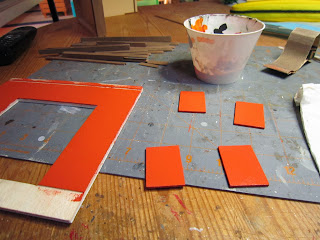 |
| Painting the wall and the door panels ochre. In reality it's not so dark orange. |
The wooden beams and embellishments were painted brown like the rest of the house.
 |
| Painting all the embellishments |
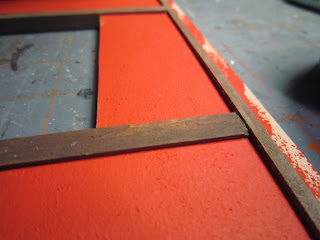
Some where a bit damaged and I had to glue them together. The external beams that are supposed to slide onto the wall pieces are always too tight so I had to sand the inside to accommodate the walls.
 |
| Measuring where to sand after fitting the outside door edging. |
No power sanding here - too small for that. So time consuming hand sanding. Having a piece of wood covered with sand paper does help tho. Fitting the left wall went smoothly but the right wall (ochre colored one) was not the greatest fit. I hope it won’t be an issue attaching it to the landing section. We shall see.
 |
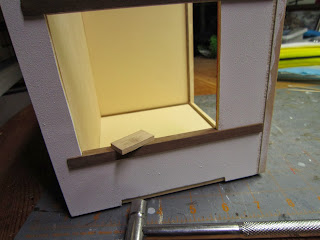
| Gluing the internal wall to the rest of the room. |
The ceiling beams (that will provide a place for the ceiling to rest on) were too long. These pieces can be a pain sometimes as they do not fit into the pre-drilled sections so easily. They’re either too long or too thick. Adjustments made here as well. The inside corners had to be decorated with similar wooden strips as well. Sanding those down to fit too.
The next step was to add the wooden decorations on the outside walls. Just a few measurements and gluing in place.
 |
| These pieces had to be 114mm from the bottom edge |
The final step in this chapter was adding in the door jambs to the sides and setting up the sliding door bottom jamb. I had to pound in one side to fit (using my trusty hammer and a small piece of wood so as not to damage the pieces).
 |
| Sometimes a hammer is needed for the fitting. |
The inside of the jambs overlapped a bit onto the ceiling support so I had to cut the excess away with my exacto knife.
 |
| Before... |
 |
| ...after. |
Once that was done, just the final four decorations on the wall around the door and the room is pretty much complete.
 |
| Final decoration glued in place. |
 |
| Internal landing wall side. |
Now for doors and flooring.
 |
| External walls. |
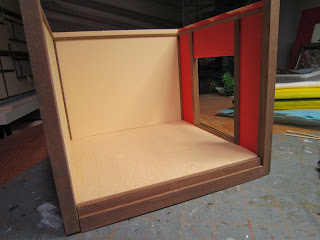 |
| Finished walls of the cooking room. |


No comments:
Post a Comment