August 9th - 11th 2014
Next were the steps. I had left these a long time ago and had to go back to figuring out a way to attach them. I obviously didn’t want to attach them till the entire floor was glued in place so now was the time. First, I had to dry fit and of course the steps were not matching up with the top landing. So, more massive sanding till I got the top steps to match as closely as possible. I then had to reglue some of the bannister and steps as they were removed while I was sanding fitting and refitting. Eventually the steps went into place. I glued the final bannister on the first floor landing then the top landing’s bannisters (using a piece of wood as a spacer to keep the left side even). And finally, I glued the kutsunugi-ishi in place and the bamboo orchid garden. The landing is done and just needs the ceiling and light fixture which I will be making later.
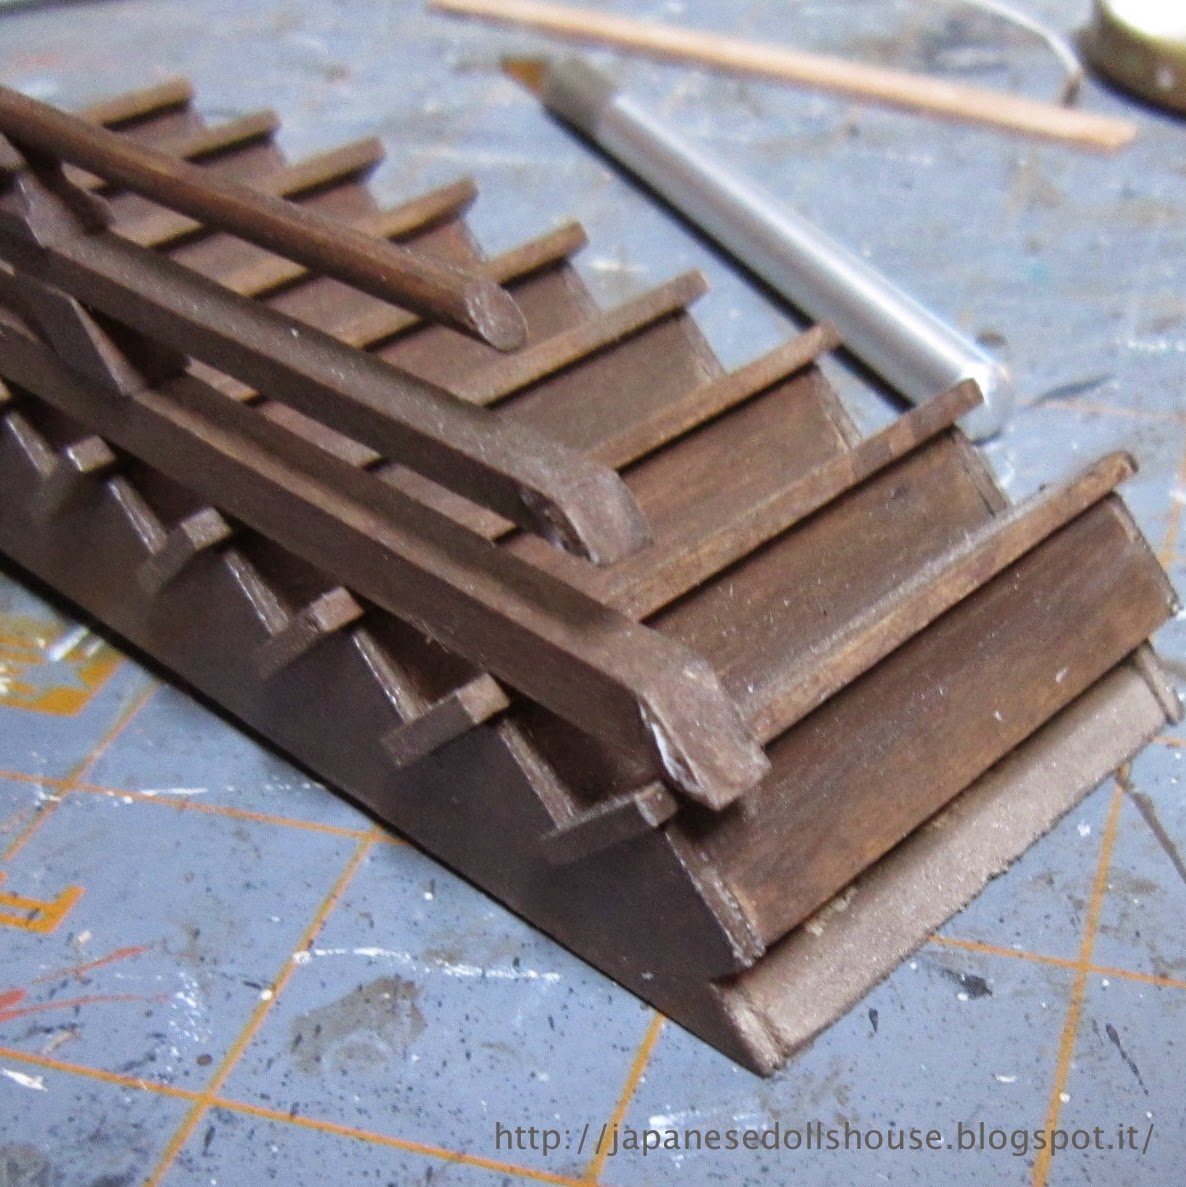 |
| The bottom of the stairs before..... |
 |
| ....and after sanding. |
 |
| You can see the space at the top still. |
 |
| Adding the front bannister. |
 |
| Adding the top back bannister (using a piece as a spacer) |
 |
| Adding the bannisters. |
 |
| Finished second floor landing. |
I jumped ahead a bit to grab the three small chapters where the kit provides pieces to make hanging lighting fixtures. Since I had already installed (drilled holes) the LEDs, I really wanted to make these lights so I could then fix the ceilings into the last two rooms on this floor and the bamboo room too. The kit came with thread for wire and a wooden bulb so I just put those aside and pulled out the pieces to make the lamp - some white paper (which I ended up subbing with shōji paper) and very small wooden pieces. I painted the small pieces black then made the shōji paper shade and glued the small pieces onto the paper. I then touched it up with a little black paint. Next was to try and fit the LED into it.
 |
| Making the shōji lantern and painting the pieces. |
 |
| Glueing them into position. |
 |
| Final center piece added. |
The LEDs have a pretty big attachment towards the bulb (I think it’s called the resistance or something) so since these lamps are quite small, I had to bend the LED back into the lamp. The next one I made a large center piece with a bigger hole so that the whole stem would slide through. I tested the bulbs and then installed the ceiling to the fire pit room and the buddha room. Cute!
 |
| Bent LED back in on itself. |
 |
| Positioned in the fire pit room. |
 |
| Making the hole a little larger to accommodate the LED stem. |
 |
| The LED fitted inside the lamp without bending. |
 |
| The LED lamp added to the buddha room. |
The next room was the bamboo room. I had installed only a back lit area where the shrine is and since I had more LEDs I decided to install a central lamp here too. The only problem was that now the second floor was installed on top of the first, I couldn’t easily remove the LED to attach the lamp. So I had to come up with a different way of hanging that lamp from that ceiling. I put the lamp together like the others but when it came time to finish the top, I added a piece of shōji paper (two pieces taped together) and made a cross slit across the top. That way, the lamp just slides on over the LED. Actually this system is much easier but not very realistic. The lamp is hard to position evenly because there is only the paper that is holding it in position. But with a little manipulation, it looked great.
 |
| Slitting the top in an X to be able to insert the LED stem. |
 |
| Finished bamboo room (using a flash). |
 |
| Without a flash and the lights lit. |
Next was the stair well LEDs. I decided to use the wallpaper from the left porch room since it is quite pretty and this lamp is going to be larger anyway so you can see the design. I used the same exact method to make this lamp only on a larger scale and using a rectangular box. I also wanted the lamp painted a warm brown since the landing has mostly brown accents. I glued everything together, checked the LEDs and glued the bathroom “lamp” in place as well. The pics don’t do it justice firstly because the batteries are low so the light is low and secondly because I had no lighting into the house. I don’t like the way a flash floods the house - it ruins the color and overall warmth of the decoration. I will be coming up with a way to better photograph the house and the rooms once the whole project is completed.
 |
| Making the lamp shade. |
 |
| Finished lamp. |
 |
| Gluing the bathroom lamp shade (on the ceiling) |
 |
| Finished landing and lit stair well lamp and bathroom. |
On to the next chapter and the final phases of the construction.

No comments:
Post a Comment