October 7th - October 10th 2014
Chapter 104 was for making one of the hanging lamps which I already did so now onto 105 which is all tiling. Since I had a nice break from tiling in my last week’s work, I need to buckle down and get some more tiles on this roof.
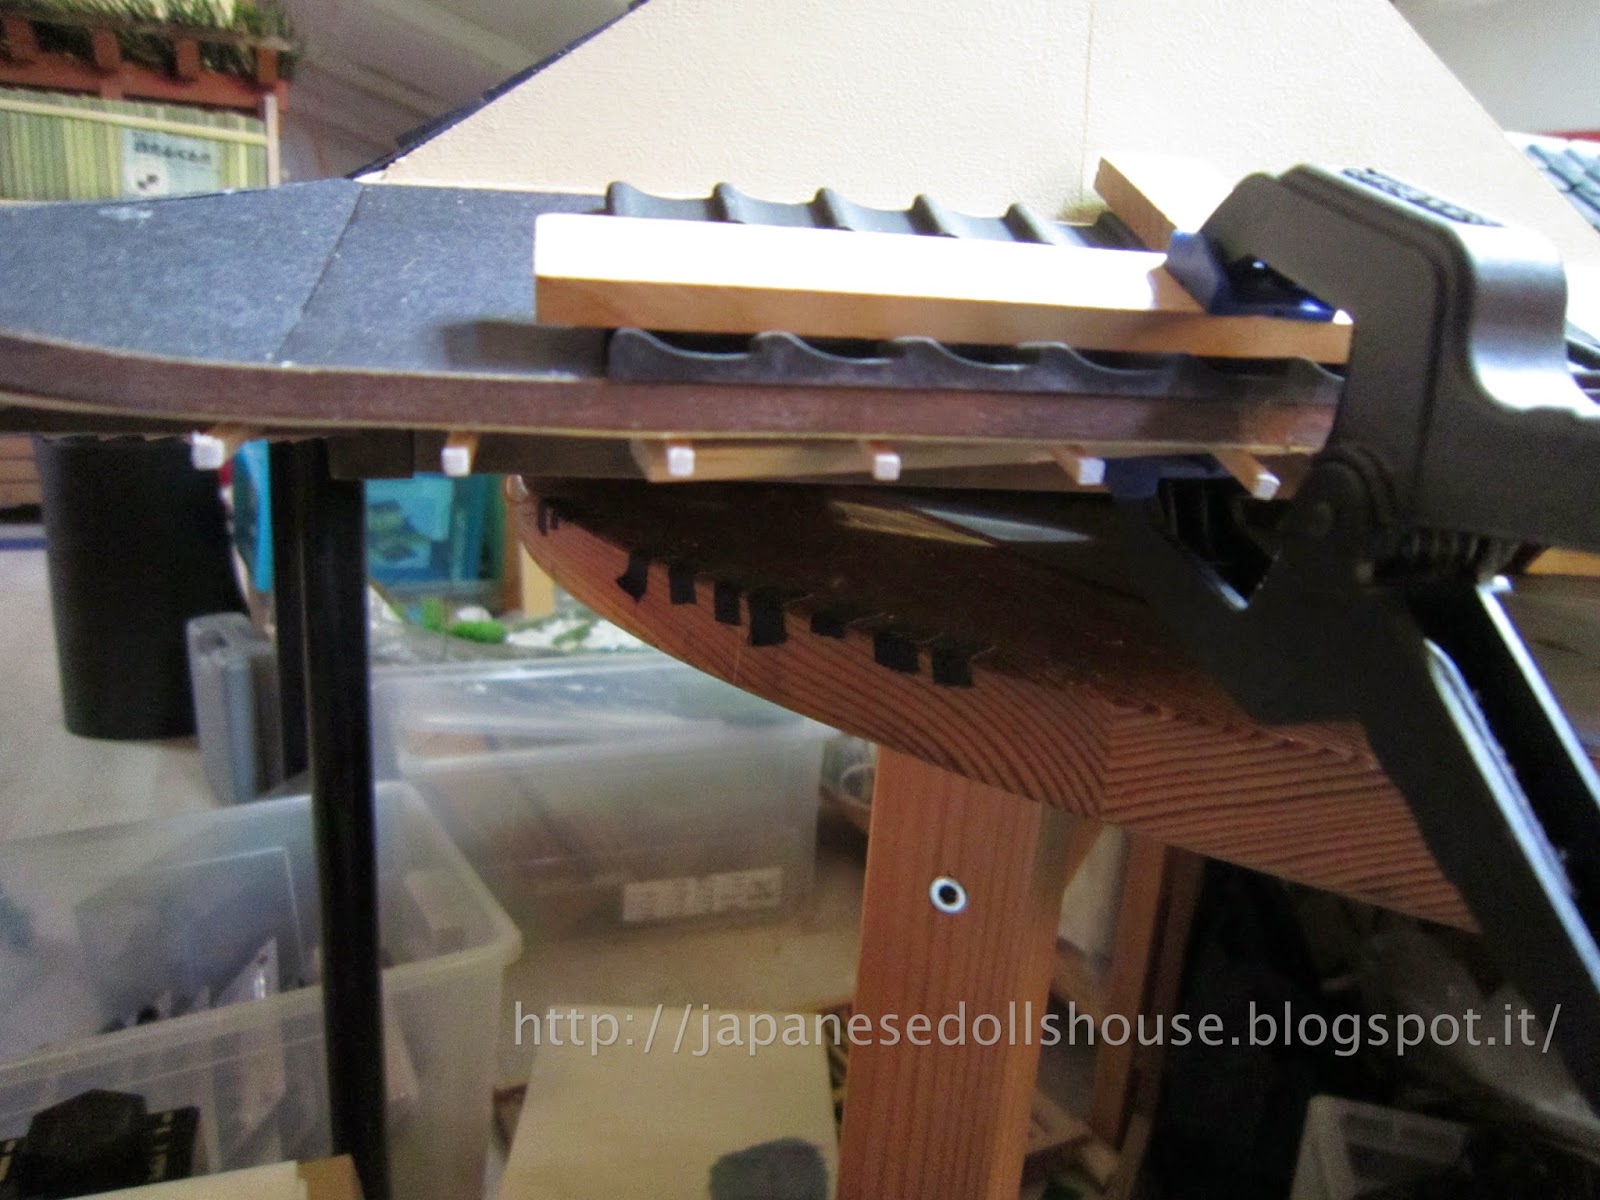
Since each one needs to be matched up somewhat and then clamped into place, the first row is always slow going. Plus the tiles are so bowed, I have to wait for the glue to set up. The other difficulty was when I clamped the pieces into place, they were breaking the fragile thin eave wood underneath. So I then I had to come up with a new way to clamp them without fracturing the wood. I used some extra bits of wood to distribute the pressure over numerous under eave decoration pieces. It seemed to work but the damage was already done on one side at least. But perhaps since we can’t really see the underside of that part of the roof, I can repair it somehow.
 |
| Trying to distribute the clamp force and avoid more damage on the eaves |
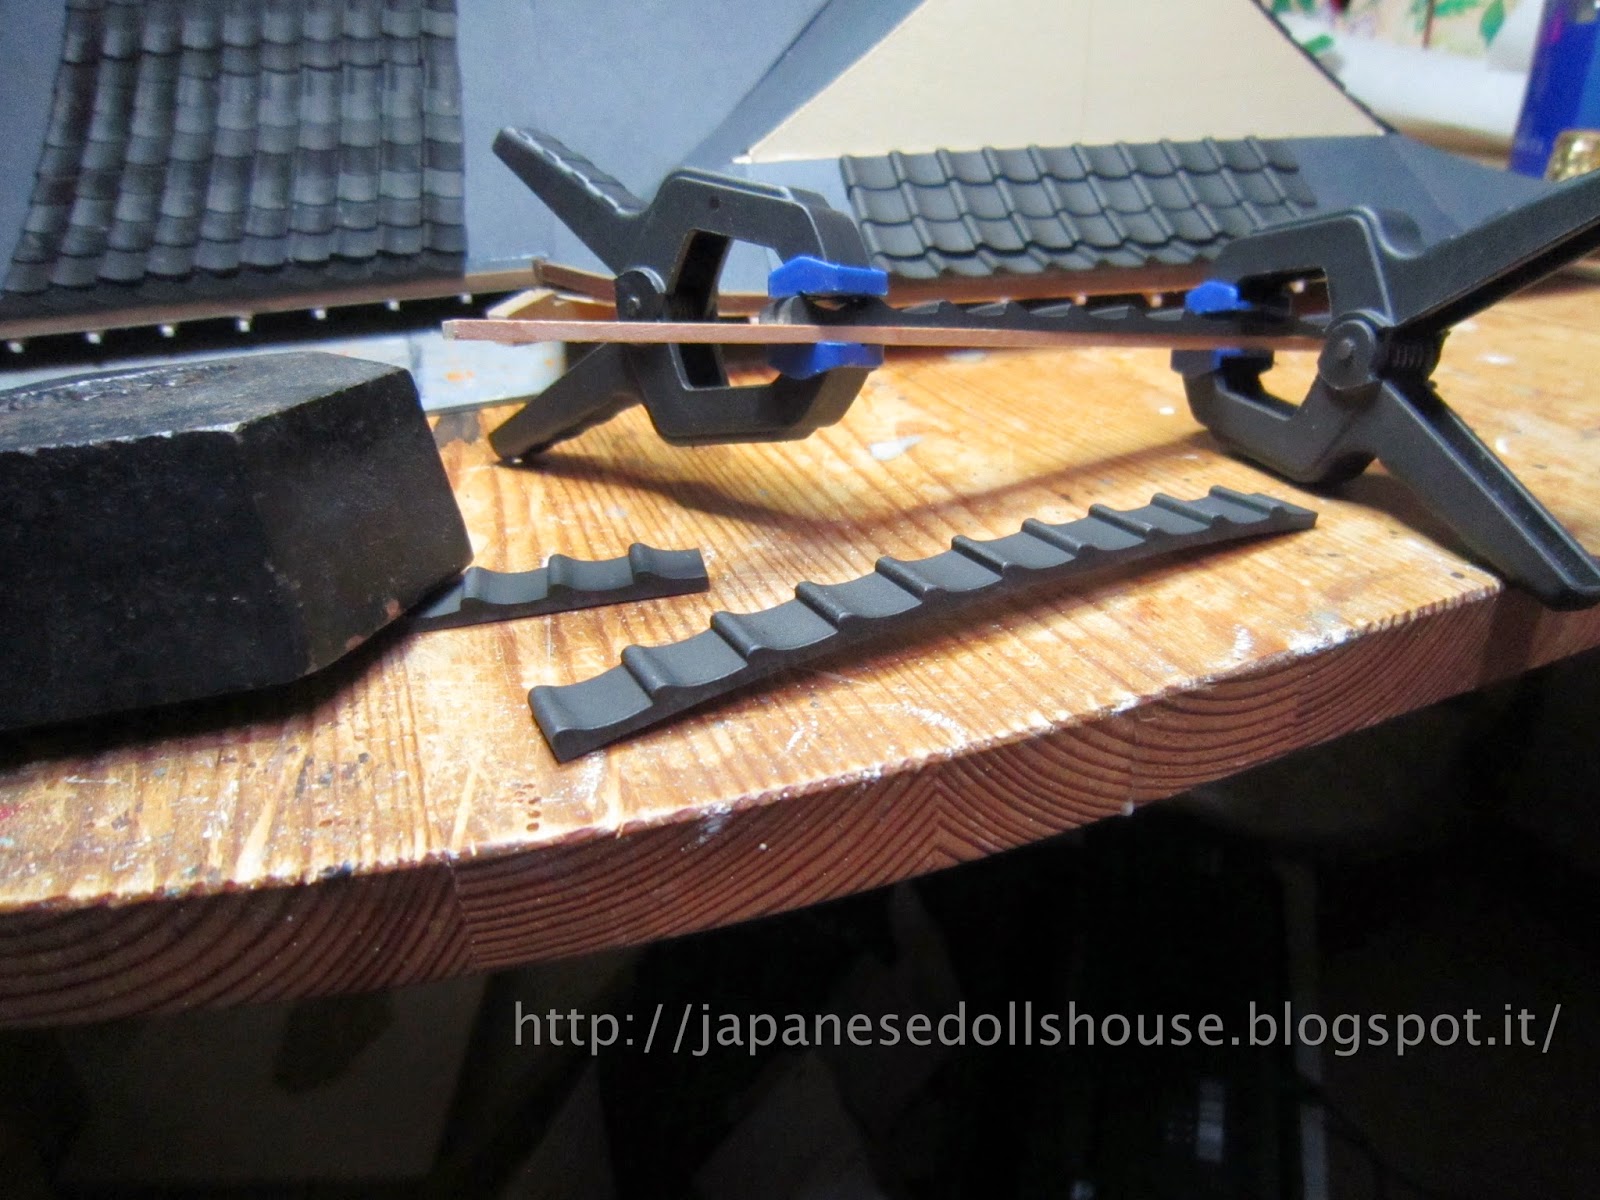
The next day, I knew I had to figure out a way to flatten out these tiles. I couldn’t keep using clamps and waiting days for stuff to dry. So I used my hair dryer to heat up some pieces then weight them or clamp them to a straight edge till they cooled back down. It seemed to work but after a short time, the tiles just rebowed again. So I had to try and glue them in place before the bowing returned. Which I did manage in the end. I finished adding this chapter’s tiling and flipped the roof over - again.
 |
| Flattening the tiles after heating them with a hair dryer. |
I fixed somewhat the damaged underside (in any case I wasn’t going to be clamping those edges anymore) with some making tape, then reattached the pieces of underside eave that had come unglued (because of flipping the roof and also because each time I move the roof on my work table, these are the points that are getting stressed). And lastly, since the roof was upside down, I drilled small holes in the six corner beams where the lanterns would eventually be attached. I figured out a way to get the tiny drill bit into my drill tool (using masking tape to thicken the actual diameter at the bottom where it goes into the bit holder) and drilled angled holes. I had purchased some “hooks” thru the mini model boat place and with a spot of glue I think they will fit perfectly for hanging the lamps.
 |
| Tiny holes drilled for eventual lantern hanging. |
But that’s a bit more ahead.....
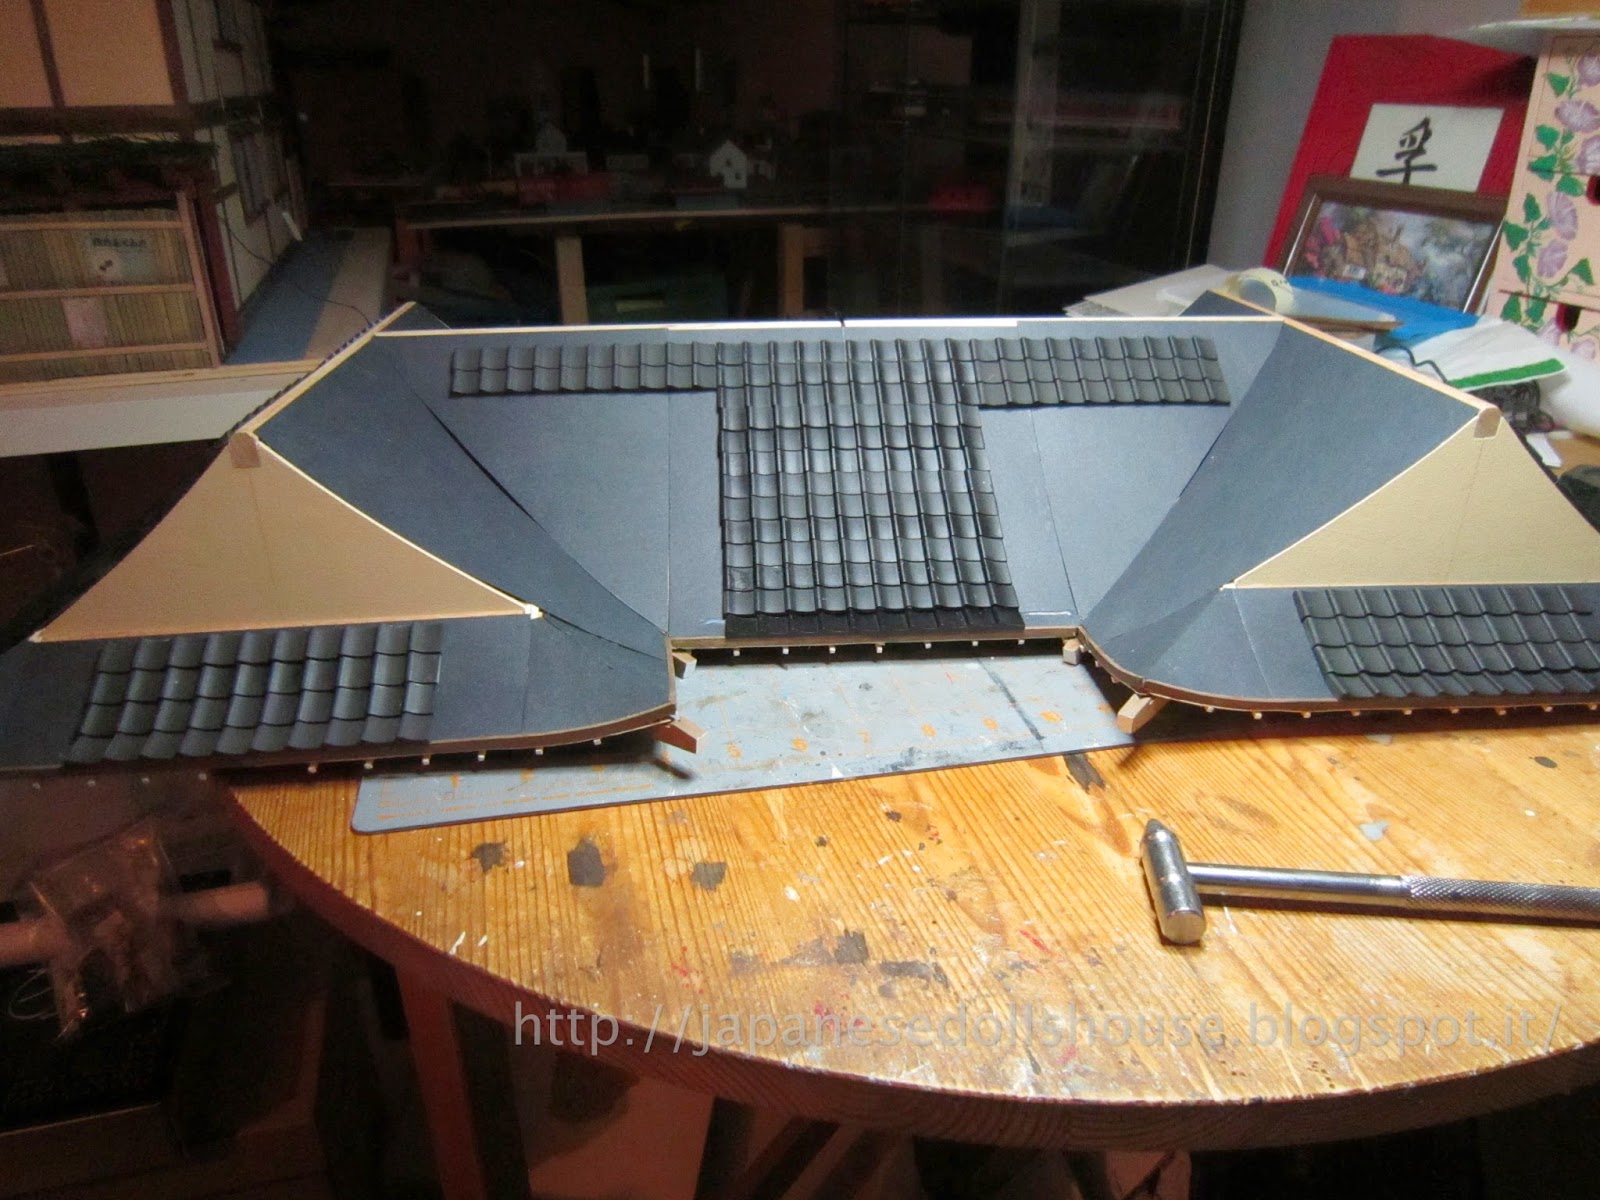 |
| This chapter's tiles in place. |
No comments:
Post a Comment