May 29th - June 13th 2015
Ikebana is the Japanese art of flower arranging. Of course it is quite old and has traditional compositions and content but for simplicity’s sake, I will create a free style or Jiyūka design. I figured I’d use some of the “flowers” I had bought at the beginning of this project and just dye them pinkish since I wanted to try and make sakura branches. The flowers already had a slight purple hue so bringing them to pink was no big deal. I then laid them out to dry so I could work with them.
 |
| Dying and drying the petals. |
I wanted to have two kinds of cherry blossoms in the ikebana vase. One from Georgie Steeds
Miniature Garden Centre kit and one using the tutorial by
Marianne Cook from the March 2015 issue of The Dolls’ House Magazine (the one with my ryokan feature). I thought the tutorial was really very nice and wanted to give it a try. The first part was easy dipping the florist’s wire into some red paint but the next part was a bit more exasperating. You have to cut some small threads and glue them to each stamen. But there was
no way I was going to be able to be super precise and get the bottom
part of the threads to match up with the underside of the red painted
bulb. So I just glued them on as best I could, let them dry and then
cleaned them up a bit. Once dried, I trimmed them down, then dabbed
more red paint on each pink thread as well as the stem and let them
dry. Next was to punch a hole in the center of each flower and thread
them onto the stem. Sometimes I punched the hole (with a needle) too
close to an edge and the petal blossom split while I slid it up the
stem. So I’m glad I made a bunch of flowers. Once that was done, more
drying time.
 |
| Dipping the tips in red acrylic. |
 |
| Cutting the stamens |
 |
| Gluing the stamens |
 |
| Finished stamens before trimming. |
 |
| After adding the flower and trimming the stamens. |
Next was making the sepal (underside petal) for each flower. Since I didn’t have a puncher, I had to take the flowers I had and just trim them into star shapes. I then painted them deep red. I did check and this part of the flower on a pink cherry blossom is quite red. So I did the same. After letting them dry I shaped them pressing a toothpick in the center and then piercing them to make the hole so I could insert them onto the stem. A dab of glue and the sepals were in place. I liked the final effect.
 |
| Trimming the stars to size. |
 |
| Finished blossome with the sepals |
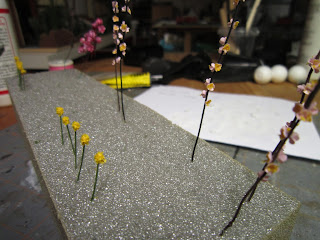
Next up was fashioning some branches. It was a bit difficult as my hands are not very steady but I managed two branches by wrapping different gauge wires around a thicker one. I added some dots of glue at the joints and let them dry. Next was just to paint them brown and let that dry too. Then I added the blossoms around the branches. I had only made 16 blossoms so I decided to use this branch as the full pink blossom and then make another with just white ones. I then added some green leaves leftover from the plastic plants I used in the back of the house. I painted them a little red and varnished them with a little shine since that’s the kind of leaf I found pictured on the net (at least with pinkish blossoms). I can’t really complain about the final result.
 |
| Final result pink cherry blossoms on a branch. |
Next up was the cherry blossom kit I got from Miniature Garden Centre. These blossoms were really quite small but still, given the small scale of the house, they would give a perfect overall look. First I painted the “branches”. I painted two black as I had seen a really nice arrangement with pink petals on a black painted branch. So I wanted to try that. Then I just formed each petal (using a mousepad and pressing a toothpick into the center) and glued each one onto a branch. After drying, I put a dot of glue on the inside of each blossom and sprinkled them with the yellow “pollen” dust. They’re perfect!
 |
| Gluing the blossoms on the branch. |
 |
| You can see the finished cherry blossoms on the right and beginning the centers for the white flowers. |
While those were drying etc., I started work on the last set of blossoms. These ones are white so I painted some petals white and let them dry. I then dipped the tips of some #30 gauge wire into glue a few times to form a round top, then into yellow acrylic, and finally into a more liquid glue solution and the yellow pollen. These will be the centers of my flowers. Once dry, I pressed the petals into shape (two per blossom) and slid them up the stem gluing them into place. Next up was to make the sepal. From what I could see, they are green for white blossoms. I managed to locate a star punch (!) even if it was too big for mini flowers it proved useful. All I had to do was to trim each of the stars more or less to size. I realized tho that the flowers looked less and less like cherry blossoms. But really that was ok with me. They still looked convincing as far as flowers go.
Once the sepals were glued in, I attached the flowers to its branch. Then I made some twisted bamboo pieces and placed all the elements into the tall vases on the top floor hallway (plus a few cherry blossom branches in the squat vase on the first floor). I made a few long leaves using the green sushi grass and the ikebana vases were done. I think it adds to the final effect in the hallways and fills out those oversized vases pretty well.
 |
| Cutting out and trimming the star shapes. |
 |
| Gluing the flowers onto their branch. |
 |
| Finishing the branch. |
 |
| Ikebana vases. |
 |
| Two larger vases with the blossoms in place. |
And another element is finished.
 |
| Left side Ikebana arrangement. |
 |
| Finished right side vase. |


No comments:
Post a Comment